Tuesday, April 26, 2011

Wildflower Week: Waking Up

All month I've been looking forward to Wildflower Wednesday, hosted by Gail at Clay and Limestone, since things are finally starting to happen in the garden. But then Gail went and declared this to be Wildflower Week! Even better! So here is my Wildflower Wednesday/Week post:


What are these crumpled, not-yet-unfurled leaves? They're the greatest groundcover to grace my garden: wild ginger (Asarum canadense). These are passalongs from Mr. McGregor's Daughter (who also posted about this plant recently).

I have issues with groundcovers. I've tried woodland phlox (P. divaricata), lamium, and sweet alyssum in the sunny front border. But nothing takes! Instead I end up with blotches of plants or, in the case of the alyssum that I attempted to grow from seed, nothing at all. Not so with wild ginger! I have these planted in what is definitely the most challenging spots in my garden: dry shade between a box elder and silver maple where they fight against not only tree roots but the remnants of lava rocks that were piled 3" deep by the previous owners. Despite all the loads I've hauled out of these borders, there are still rocks worked well down into the soil thanks to years of downright stupid landscaping.

And yet these wild ginger are thriving! I initially received a few clumps (which I neglected to water and afflicted with some of the worst transplanting treatment one can give to plants). Over the past year, and now again this spring, they've started spreading and are almost reaching the stage where one could call a plant a true groundcover. Their thick, hunter green, heart-shaped leaves are a lovely backdrop, and I've been amazed at their drought tolerance. I'm planning to add many more clumps (assuming I have to given how well they're doing already).

If you have groundcover issues and need something for dry shade, look no further: wild ginger! (There is a European variety as well but I've never grown it and can't attest to its attributes.)


In other wildflower happenings, the pasque flowers are looking a little wilted from the cold and rainy weather, but their foliage is starting to unfurl and the second plant (not pictured) is in bud too. I'm absolutely loving these flowers and I'm considering planting more in place of crocuses. The fuzziness on the foliage is also suggesting to me that these really are the North American species, Anemone patens multifida. It's hard to tell because they're so similar to the European variety.


A golden alexander (Zizia aurea) is also about to bloom! Late April is a little early for these to flower, but hey, this plant is obviously loving life. My other zizias are well short of the flowering stage, but given all the moisture we've had lately I hope they're getting charged up for a great spring.


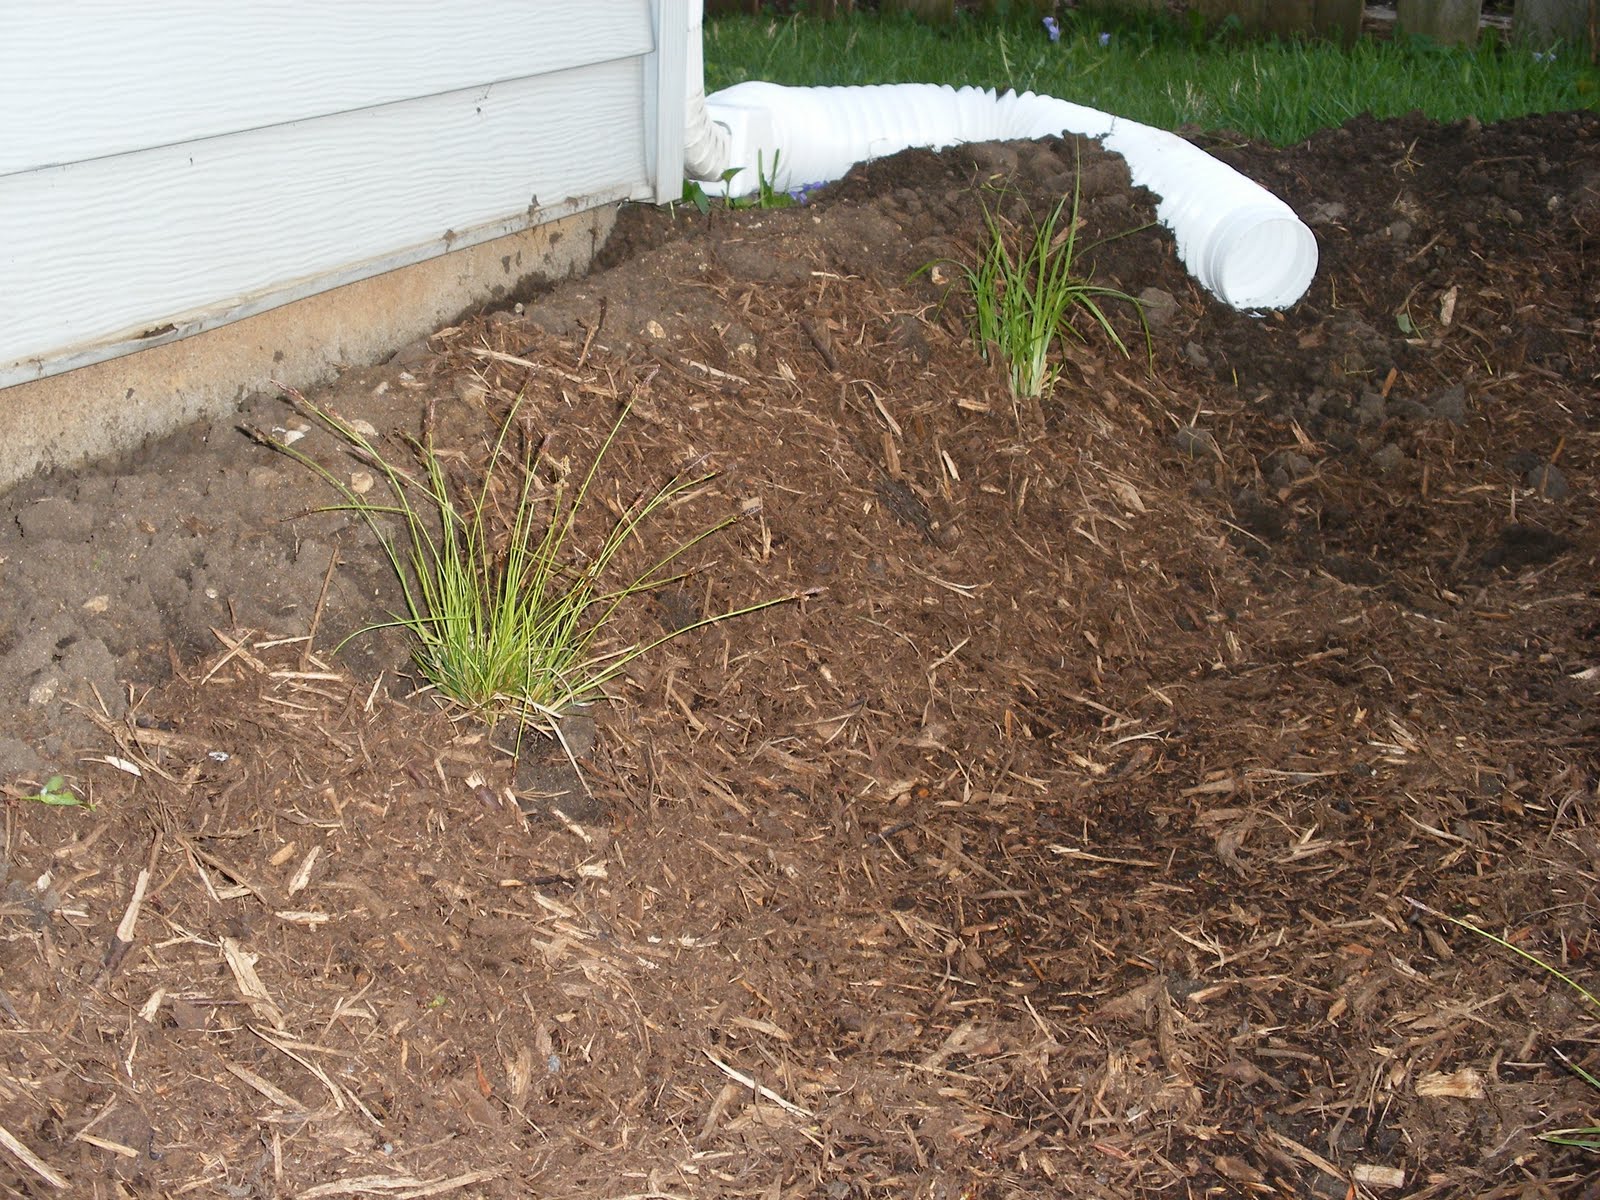
Pennsylvania sedges (Carex pensylvanica) in the rain garden are in full "bloom," looking like miniature yellow feather dusters.


And lastly, one of my prairie smoke plants (Geum triflorum) is budding, just the littlest bit. I'm afraid these plants are not getting enough sun in their current location, but since they're only in their second year I'm not going to make a judgement on moving them quite yet.

So much else is up and growing that it's much too much to name here. Despite spring's reluctance to show up, the garden is moving ahead anyway!

Monday, April 18, 2011

Rain Gardens 102: How to Dig the Garden

Follow-on to the previous post: Prairie Rose brought up a very good point in the comments that rain gardens should not be sited near septic tanks. If you're in a rural area and connected to one, plan your rain garden away from the septic system!

So you've chosen your site and you're ready to make your rain garden happen. How do you do it?

First, before you dig call your local utilities! In Illinois this means calling JULIE at 811. All other states, whatever your service is make sure to find it and call.

Once you've gotten the all-clear that you won't be cutting off the neighborhood's cable and inciting an angry mob, plan out your design similar to that of any new garden. One rule of thumb is that the total size of the rain garden should be 10-30% of the area providing runoff. So if your roof is 1800 square feet, the rain garden should be about 450 square feet.

That's pretty big, but by all means go for it if you have the space. Remember, however, a rain garden that is not made to these specifications will still work just fine.

Now for the Hard Part
Mark out your design with a hose, twine or flour, and if the spot is covered with grass decide how you will remove it. If it's a relatively small space you can smother the grass with black and white newspaper and mulch for a couple weeks and then dig up the sod. Honestly, I've dug up smothered grass and non-smothered grass and I think it's equally difficult.

If you're planning a large rain garden (like that 450-square-foot one) you may want to consider renting a sod cutter or finding some burly helpers to do the sod removal. In the event you can't locate a sod cutter or burly individuals, digging a small rain garden is totally achievable for one person. I am a complete wimp in terms of physical strength, and I managed it for a 6'x4'x1' space. Tailor your plans to what you want to handle. Taking on too much is just not enjoyable, and frustration and physical pain is not what this is about.


A look at the ugly but necessary process of digging (I was interrupted by rain before this picture).

How deep to dig? Plan on 6-12" deep. I have seen recommendations for digging a rain garden only 3" deep, and if it's an extended bed this makes sense. Sure, a 15'-long rain garden at 1' deep would certainly absorb a large amount of water, but it also means you're installing a full-on pond in your yard.

Conversely, a rain garden that is shorter and narrower yet still 8-12" deep will effectively absorb a lot of water without taking up so much space. The choice is really up to you depending on your site characteristics and the amount of real estate you want to dedicate.

As you're digging, take some of the excavated dirt and pile it around the edges of the rain garden to make a berm. This will help prevent overflow. You can leave a space for outflow if you're concerned the rain garden will be very full. Just be sure the slope of the berm is gentle, around 45 degrees or even more gradual. My berm is steep and it has resulted in mulch erosion. It's not the end of the world but it's messy and could have been avoided.

To increase absorption, you can amend your soil with sand and/or compost. Some guidelines are 30% soil, 30% sand and 30% compost (yes that only totals 90% but you get the idea). Again, I added nothing to my clay soil and it absorbs just fine. Don't feel you must amend the soil unless the drainage is very poor and could become a problem with mosquitoes (see the previous post for info about drainage needs). You shouldn't need to enrich the soil for the plants because they'll be tough ones that can handle drastic changes in moisture (more on that in another post). If you are amending the soil, do it once you've dug the garden so you can get it all worked in before planting.

Getting the Water There
Directing a downspout into the rain garden is ideal. There are a few ways to do this: One is to get a simple plastic or metal downspout extension and aim it towards the rain garden. I prefer plastic because it can be lengthened, shortened and/or curved to fit the needs of the site.

You can also bury the extension if it's more than a few feet and might look unsightly. Just dig a trench for it and throw the dirt back on top, making sure that the extension reaches the rain garden itself. Voila!

If the rain garden is really far from a downspout or the garden is long, consider adding a little pathway of river rocks from the downspout into the garden. It's a little more labor with moving some rocks, but they look pretty and will convey water at a distance that might not be feasible with a downspout extension. If the burly helpers from the previous step are still in the picture, have them haul the rocks.

So, to recap:
1. Call your local utilities.
2. Mark out the garden shape and remove the grass.
3. Dig approximately 6" deep, less if the garden is large, more if it's small.
4. Use excavated dirt to make a gently sloping berm.
5. Add sand and/or compost if needed to increase absorption.
6. Aim a downspout into or towards the garden.

Next up...the fun part! Choosing rain garden plants!

For further reading: Here is a helpful page on rain garden construction from the Low Impact Development Center.

Friday, April 15, 2011

April GBBD: Real Blooms!


Things have finally started to bloom! Like most gardens in April mine has daffodils...


...and this lovely hellebore (passalong from Mr. McGregor's Daughter).


The pasque flowers (Anemone patens) are huddling together for warmth. In typical Chicago fashion, April has taken a turn back to cold and windy weather.


The inflorescences on these Pennsylvania sedges (Carex pensylvanica) are "blooming." I'm happy to see these doing so well and even spreading a little along the berm of the rain garden. The ones in the basin and along the other berm are not as vigorous; a consequence of less-than-ideal siting for these sedges which prefer dry shade. Now that I know they're thriving in this location, I think I might add a couple more because that side of the rain garden needs stabilization, and if there's something that wants to grow in that mostly-very-dry-occasionally-flooded-shade, then be my guest!


And the forsythia is making a valiant attempt at blooming. Trapped in dry shade, this shrub is doomed to a lackluster existence since it grows directly on top of the electric and cable lines (this is why you should call the utility people before digging!!). But it's doing the best it can with what it's got.

New foliage and buds are everywhere, and it's both exciting and nerve-wracking to see what made it through a long, cold winter. If the weather would just stabilize a little, I would have my lettuce and broccoli seedlings in the veggie garden since they're exploding out of the seed starting tray. Hopefully this weekend it'll happen!

For more Bloom Day posts see Carol at May Dreams Garden!

Tuesday, April 12, 2011

Take it Down a Notch!


My pasque flowers are blooming! (And right on time with their name, seeing as Easter [Pasqua in Italian] is right around the corner.)

I had to take these pictures in this harsh light because they close up at night and flower again in full sun. I think only one of my two plants made it, but so what? Look how cute they are! Totally worth the two-year wait!

I am fairly certain these are Anemone patens multifida, the variety native to North America, but quite honestly it might be Anemone patens patens, the Eurasian variety. Even Illinois Wildflowers finds they're difficult to tell apart, and the foliage of mine looks a little different than the pictures on IW.

Even if this isn't the native variety (which was bought at a native plant sale, I might add, so the error wouldn't exactly be mine), they're still adorable and I'm happy to have the blooms. This brings me to some thoughts on the recent backlash against native plants and those who grow them. There was a recent article in the New York Times that defends gardening with non-native species and kind of compares native plant enthusiasts to the Minutemen and other gun-toting militias along the border with Mexico. On Chicago Garden Mr. Brown Thumb claims that, prior to meeting some friendly garden bloggers, he was offended by native plant proponents and went so far as to say: "It is unfortunate that the native plant movement attracts self-righteous extremists, but it is a reality."

Who are these people meeting?? Who are these native plant gardeners who are bludgeoning people over the head with native plant ideology? I've met some dedicated native plant lovers but I've never been made to feel guilty for growing some bearded irises and peonies. Now, I'm sure native plant zealots are out there because there are zealots all over the place. But really? For Raffles in the NYT to mention kudzu and economic benefits in the same breath is pretty laughable. (People in the mid-Atlantic states who lose power in a minor gust of wind thanks to out-of-control kudzu bringing down power lines might disagree. I would know; I work for some of them.) To me this smacks of plain old contrarianism.

If you're a native plant enthusiast who harps on people for growing some hostas, please stop it!! You're making the rest of us look like jerks and you're damaging the entire idea of growing plants that have evolved within a food web in a particular place. But for other native plant contrarians, listen to what you're saying. Is it really so bad to grow plants that have evolved with insects, birds and other members of the food web for thousands of years? Is it really so terrible if I want to give my garden a sense of place by making it look like the shortgrass prairie/savanna that it was before people started farming here?

No, there is nothing wrong with growing non-native plants that thrive in your conditions and look nice (I love 'David' phlox and would tell anyone who ragged on me about growing this non-native to kiss my butt; it does great here and avoids powdery mildew). But there is also nothing wrong with truly loving the plants native to your region (desert, swampy, forest, prairie, whatever) and you can't really deny the fact that indigenous plants evolved with and therefore are part of complex ecosystems that shouldn't be trashed just because, oh well, we already moved here.

Everyone just take a breath, please! We're all gardeners!

For a good rebuttal of Raffles' article, see Ben's post This Guy is an Idiot at the Deep Middle.

Thursday, April 7, 2011

Longest. Germination. Ever.


Columbine seeds (Aquilegia canadensis) are notoriously slow germinators, at least whenever I start them indoors. Multiple times I've been fooled by seeds that took three weeks to sprout, when only laziness kept me from discarding the soilless mix that seemed devoid of seedlings. Then when they do sprout I'm proud of myself for being so lazy persistent.

But this year is a new record! I have four new seedlings that have sprouted within the last 48 hours, including one I just saw this morning, a full 37 days after planting!!

So the lesson here is, with columbine seeds, laziness patience is a virtue!

Saturday, April 2, 2011

Rain Gardens 101: How to Choose a Site


So you like the idea of a rain garden. Capturing runoff, filtering pollutants, growing native plants, supporting biodiversity and recharging groundwater all appeal to you. But where do you put one?

Well, the first thing to do is take a close look at your property. Is there a natural depression or bowl-like part of the garden or yard? Have you noticed water pooling there when it rains? If so that's a prime candidate. And lucky you--less digging!

Even if you don't have a natural swale (i.e., depression or bowl-like area), look for places that become waterlogged in the rain. Maybe there is a spot by a downspout that puddles, even when it's not a torrential downpour. These places are already collecting water so by planting a rain garden you can help along the process of the ground absorbing the water.

Let's say there's no place like this on your property anywhere, and rain seems to drain away from everywhere quickly. Well, then you can choose a site in the vicinity of a downspout and plan to dig the depression yourself (more to come on that).

One thing to note: Your rain garden needs to drain completely in 48 hours or you run the risk of hosting a mosquito breeding ground! So before breaking out the shovel, test your location by digging a small hole 6-8" deep and fill it with water. If it drains in a day or even less, you're good to go. If the water is still there after two days you should look for a site elsewhere.


In my experience, I found places in my garden where extensive puddling was keeping the ground bare, and I planted water-loving yet drought-tolerant plants (more details on those in another post). My rain garden is in a spot where the gutter overflowed and the downspout is nearby, so with even a mild rain this patch of dirt turned into a huge puddle. It seemed to me a natural fit. (See the original site in the photo above.)

Similarly, in my front border there is a spot where another gutter overflows (yes, we do clean our gutters but it's nearly impossible to keep up with all the mature trees around here).

I didn't dig a rain garden per se, in fact this was before I planted my actual rain garden. I just planted things such great blue lobelia (L. siphilitica) and Joe-Pye weed (Eupatorium maculatum) to help the absorption.

The point is to listen to what the land is telling you. If there is a spot where water naturally collects, then it's a good bet that site can support wetland-type plants. But, if you don't have a naturally soggy spot you can still increase rain collection and absorption by creating one. Keeping it relatively close to a downspout will allow you to direct more water into it, thereby increasing its ability to do all the good things rain gardens do.

The Big Caveat

The prevailing wisdom is to site a rain garden 10 feet from your house. I learned this from two different presentations on rain gardens (one by with Wild Ones with a speaker from Prairie Rivers Network and one from the local Wildflower Preservation & Propagation Committee). The sensible thought is to keep water from pooling near your foundation and basement were it could cause a leak. If you've located a spot kind of close to your house where you'd like to plant a rain garden, think long and hard about digging from that spot a few feet out to keep the rain garden away from your house. You can dig the rain garden at 10 feet away, extend your downspout with a plastic extension piece and run it down a path of river rocks (more details on that later too).


Now, in all honesty, my rain garden is not 10 feet from my house. You can see in the pictures that it's right next to my house. Why? Because my house is on a slab (so no basement to flood), and I tested this spot for permeability with the 6-8" test like I mentioned earlier. The water drains here in barely a couple hours, so I was confident that drainage wouldn't be an issue. Plus, I made a relatively tall berm against the house to keep water from saturating the foundation.

So yes, it can be done but I wouldn't recommend this across the board to anyone and everyone interested in a rain garden. You have to evaluate your site based on your conditions and your house!

So what did we learn?
1. Pick a spot that already collects water or a place sort of by a downspout where you can dig a depression.
2. Make sure the water drains from your site in 48 hours or less.
3. Evaluate how close the rain garden will be to your house and keep the 10-ft guidance in mind.

Next up...how to actually dig the rain garden!

FYI: Dr. Stacy James from the Prairie Rivers Network says April and May are the best times to create a rain garden because the soil is soft but the weather is not too hot!

You May Also Like

Related Posts with Thumbnails